Dashboards
Dashboards are high level cutomizable user interfaces supported by all Brain4it Managers that interact with a server module through the HTTP REST API.
A dashboard can contain widgets of different types (buttons, leds, displays, switches, ...), some of them show data from the server while others send orders or data to the server.
The complete list of widget types available is shown in the widgets reference page.
Visual dashboard design
The Brain4it manager for desktop computers (manager-swing) has a WYSIWYG visual tool for designing dashboards very quickly.
To create a dashboard, follow these steps:
Step 1: Open designer
Select the module where you want to create the dashboard and choose the option View > Designer from the menu. A designer panel will appear on the right.
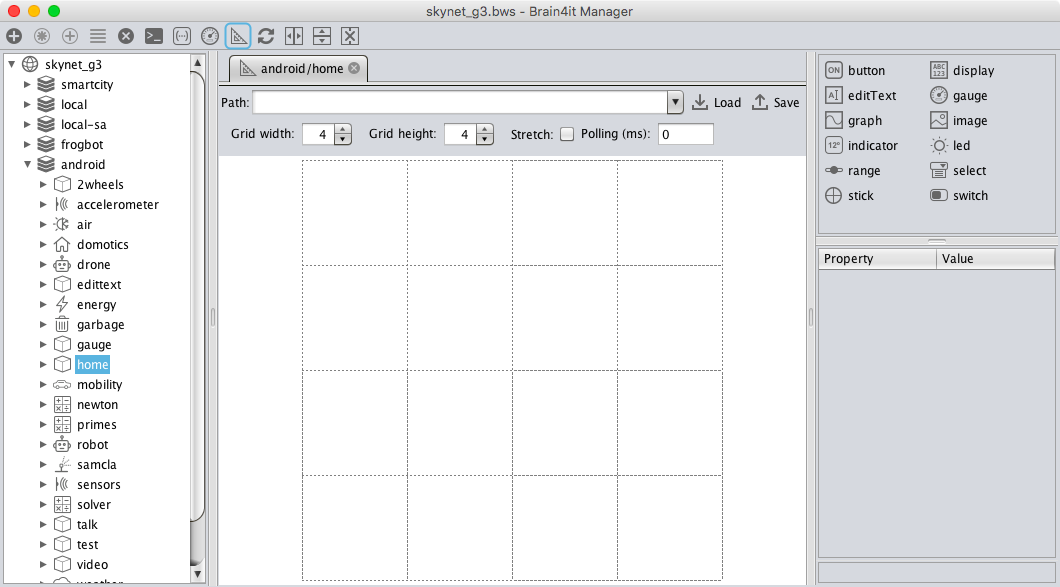
Step 2: Change the dashboard settings
Set the width and height of the grid where you will be place the widgets of the dashboard. With the strech option checked, the grid will expand to fit all the screen.
Next you can set the value of the polling interval, in milliseconds. The server will evaluate the exterior functions specified in the widgets at this interval. When the polling interval is 0, the server will only evaluate an exterior function when it receives a change notification for that function. See the module-notify function and the REST API documentation to know more about exterior functions.
Step 3: Add widgets to the dashboard and set their properties
To add a widget to the dashboard drag it from the palette and drop it to the desired cell. You can change its position by dragging it with the mouse. You can also resize it by streching the widget by its edges.
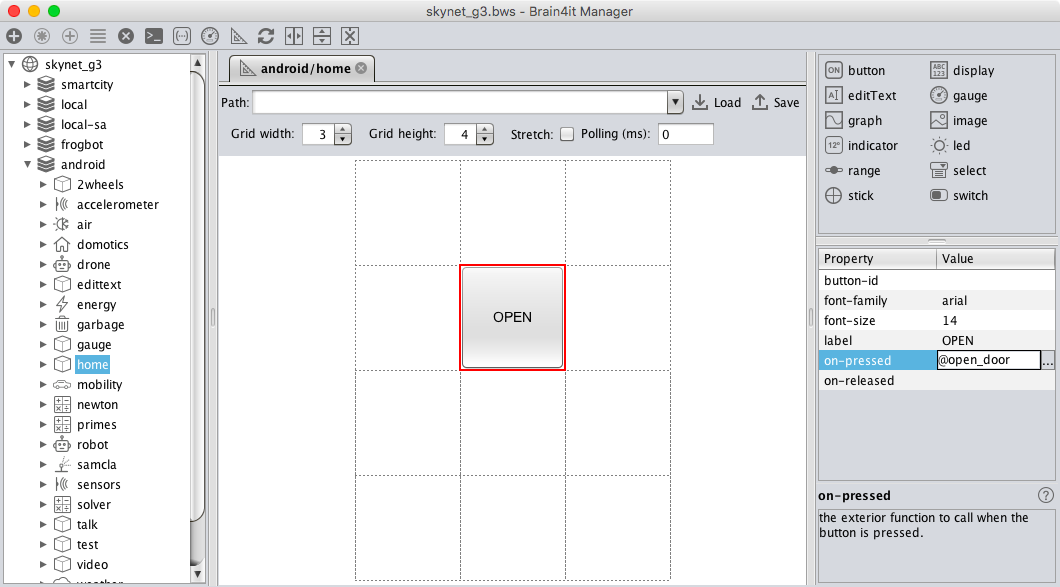
To configure a widget, select it with the mouse. Its properties will be shown in the properties panel on the right. Some of them allow you to change the aspect of the widget while others let you specify the name of the exterior functions that will be called to exchange data with the Brain4it module.
Step 4: Save the dashboard
Once the design of the dashboard is completed, set its name in the path field (for example dashboard) and press the "Save" button.
 Your module may have as many dashboards as you want, simply give them a different name.
Step 5: Create the @dashboards function
The managers always invoke the exterior function @dashboards to get the list
of all the dashboards available for the current module. This function may be defined like this:
(function (context data)
  (list "Control" => dashboard)
)
The name "Control" is the label that will be displayed for this dashboard in the manager applications.
The list of dashboards returned by the @dashboards function may change according with
the credentials presented by the user in the context/request-headers.